We encourage all in our community to take personal safety measures. This includes remaining up to date on your vaccinations and following CDC guidelines if you are recovering from a viral respiratory illness such as the flu, RSV, or COVID-19. For the health of all in our community, please remember to stay home and away from others if you are sick.
Vaccination Information
Vaccination is strongly recommended for all eligible students, faculty, and staff. Learn more about the CDC’s recommendations for vaccination. On-campus vaccination clinics will return in October 2024. Sign-up information will be posted when available.
Protocols for If You Test Positive for COVID-19
Community members no longer need to report cases of COVID-19 to the university.
All community members who have symptoms suggestive of a viral respiratory illness such as the flu, RSV, or COVID-19 are now advised to follow the updated respiratory virus guidance published by the CDC. Note that a COVID-19 illness no longer carries a mandatory 5-day isolation period. See the CDC Respiratory Virus Guidance Snapshot for guidance. Please connect with your healthcare provider if you need additional information or advice. Students who receive their healthcare on campus can reach out to Retriever Integrated Health.
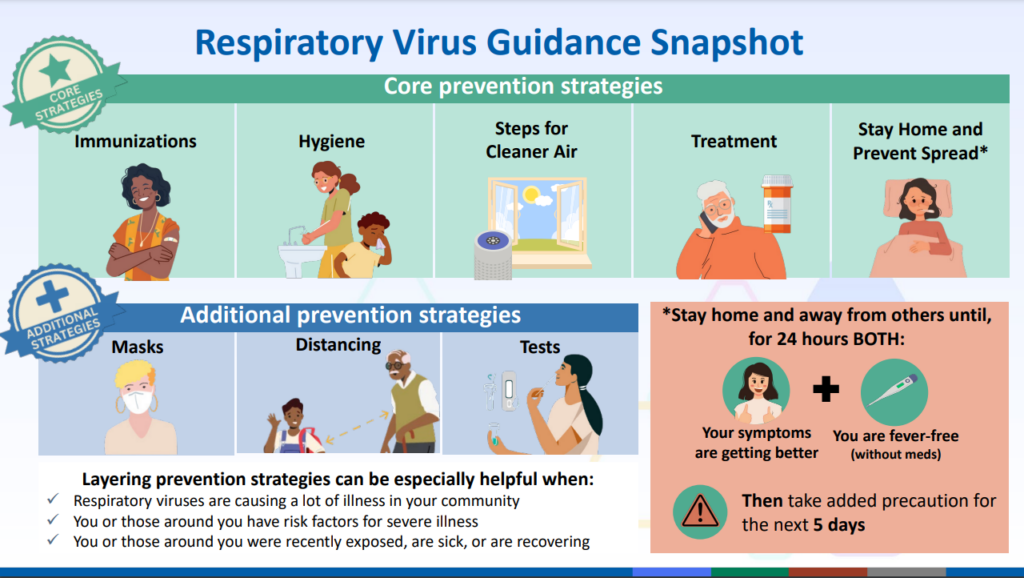
Students living with a roommate in residential housing are strongly encouraged to go home until symptoms improve. If this is not possible, residential students will stay in their current room assignment, and can use added precautions such as masking, handwashing, and surface cleaning to reduce transmission risks to the roommate(s). Residential students who need additional support should contact Residential Life directly.
![]()
If your illness interferes with classes and/or work, please contact your instructor and/or supervisor to make arrangements.
COVID-19 and Flu Testing and Treatment
Please consult your healthcare provider for testing and treatment. Retriever Integrated Health will continue to provide evaluation and testing for symptomatic community members as a part of a regular medical visit.
At-home COVID-19 rapid test kits are available for purchase at the Yum Shoppe and the AOK Library vending machine.
Face Masks
We ask that all in our community keep masks in mind by carrying a mask with them and respecting individuals who need or choose to wear a mask. After the current supply of free masks on campus is exhausted, they will be available for purchase at the Yum Shoppe and the AOK Library vending machine.
If your professor, colleague, or other community member requests that you wear a mask in a classroom, meeting, or other situation, we ask that you respect their wishes and needs.
Have Additional Questions?
Please contact the appropriate campus office:
- Student health: Retriever Integrated Health, 410-455-2542, rih@umbc.edu
- On-campus living: Residential Life, 410-455-2591
Missing Class or Work?
- Students should reach out to their individual professors to make arrangements should they miss class due to illness. Faculty and staff should work with their supervisors.